Set up your Stripe account
Connect Stripe once so you can accept online payments and get paid out to your bank.
Before you can collect payments online, you connect a Stripe account. Stripe securely handles the payment page, verifies your identity, and pays out to your bank — Eave never touches your money. Setup takes just a few minutes.
Go to Settings → Account → Payments and click Set up payments.
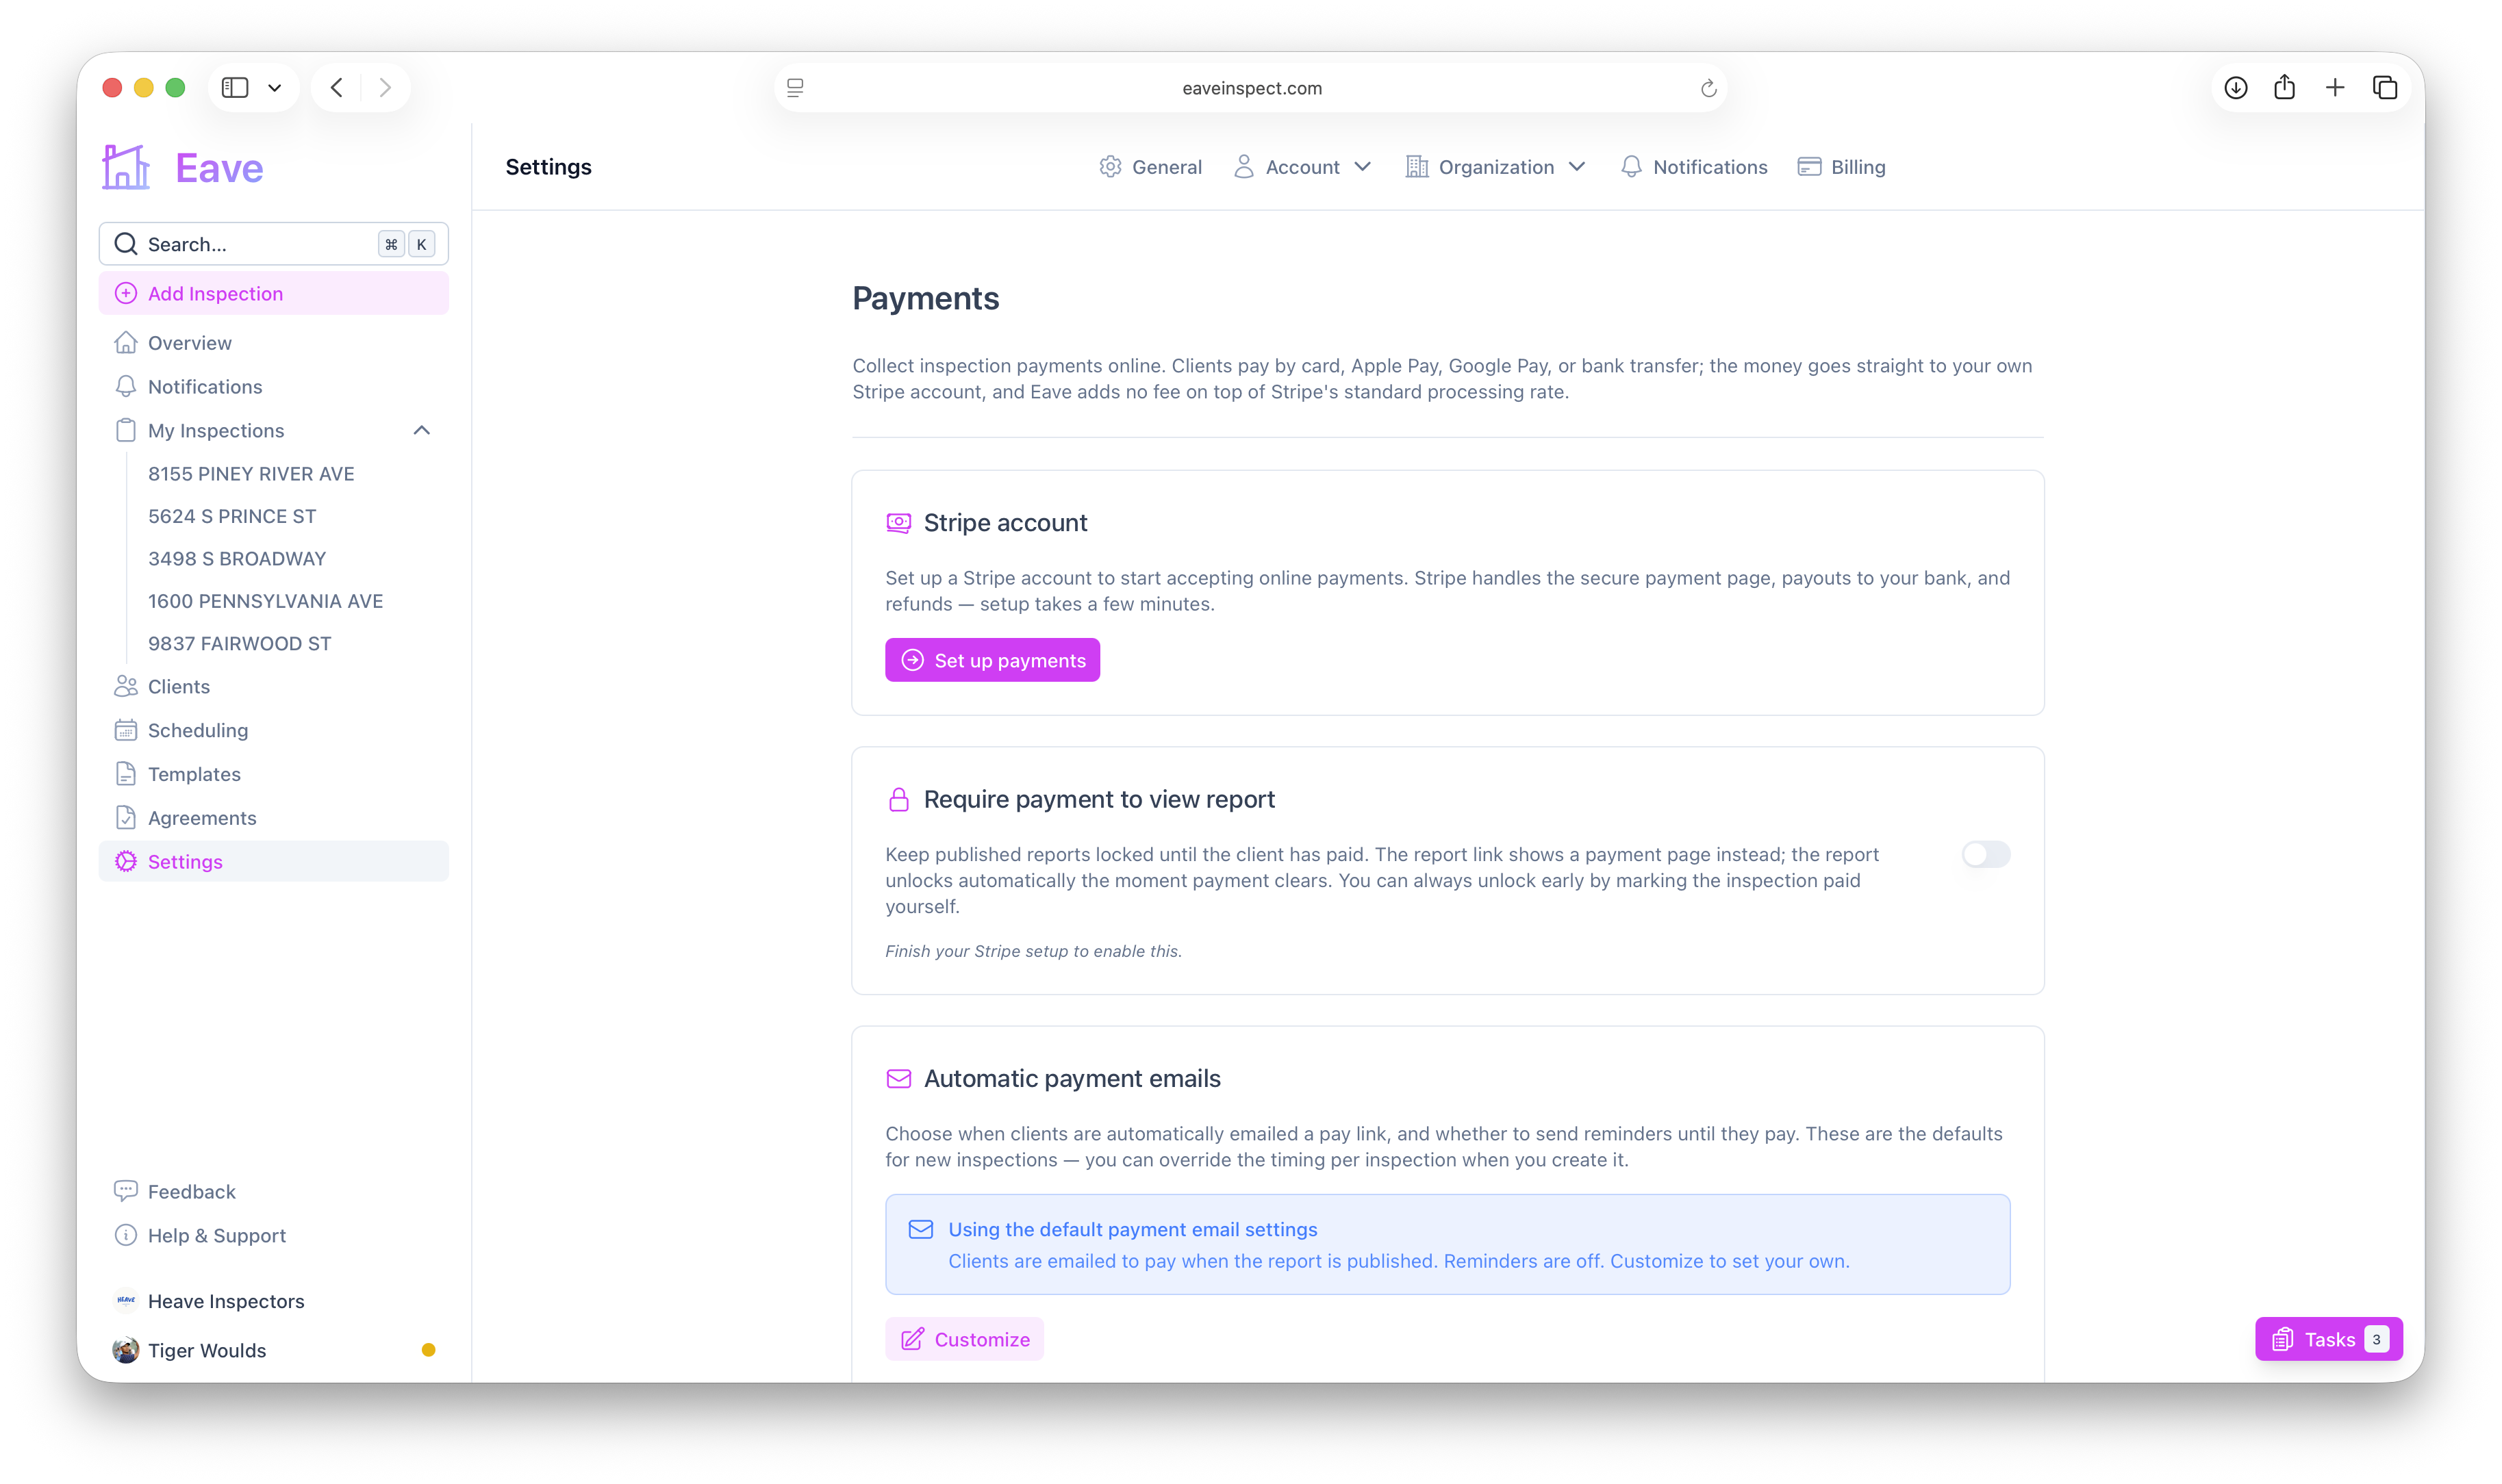
What Stripe asks for
You'll be handed off to Stripe's own secure onboarding, where you'll enter:
- Your business/contact details and address
- Enough identity information for Stripe to verify you (this is standard for anyone accepting card payments)
- The bank account where you want your payouts deposited
When you finish, Stripe sends you back to Eave and your status updates automatically.
The four setup states
Your Payments settings show exactly where you stand:
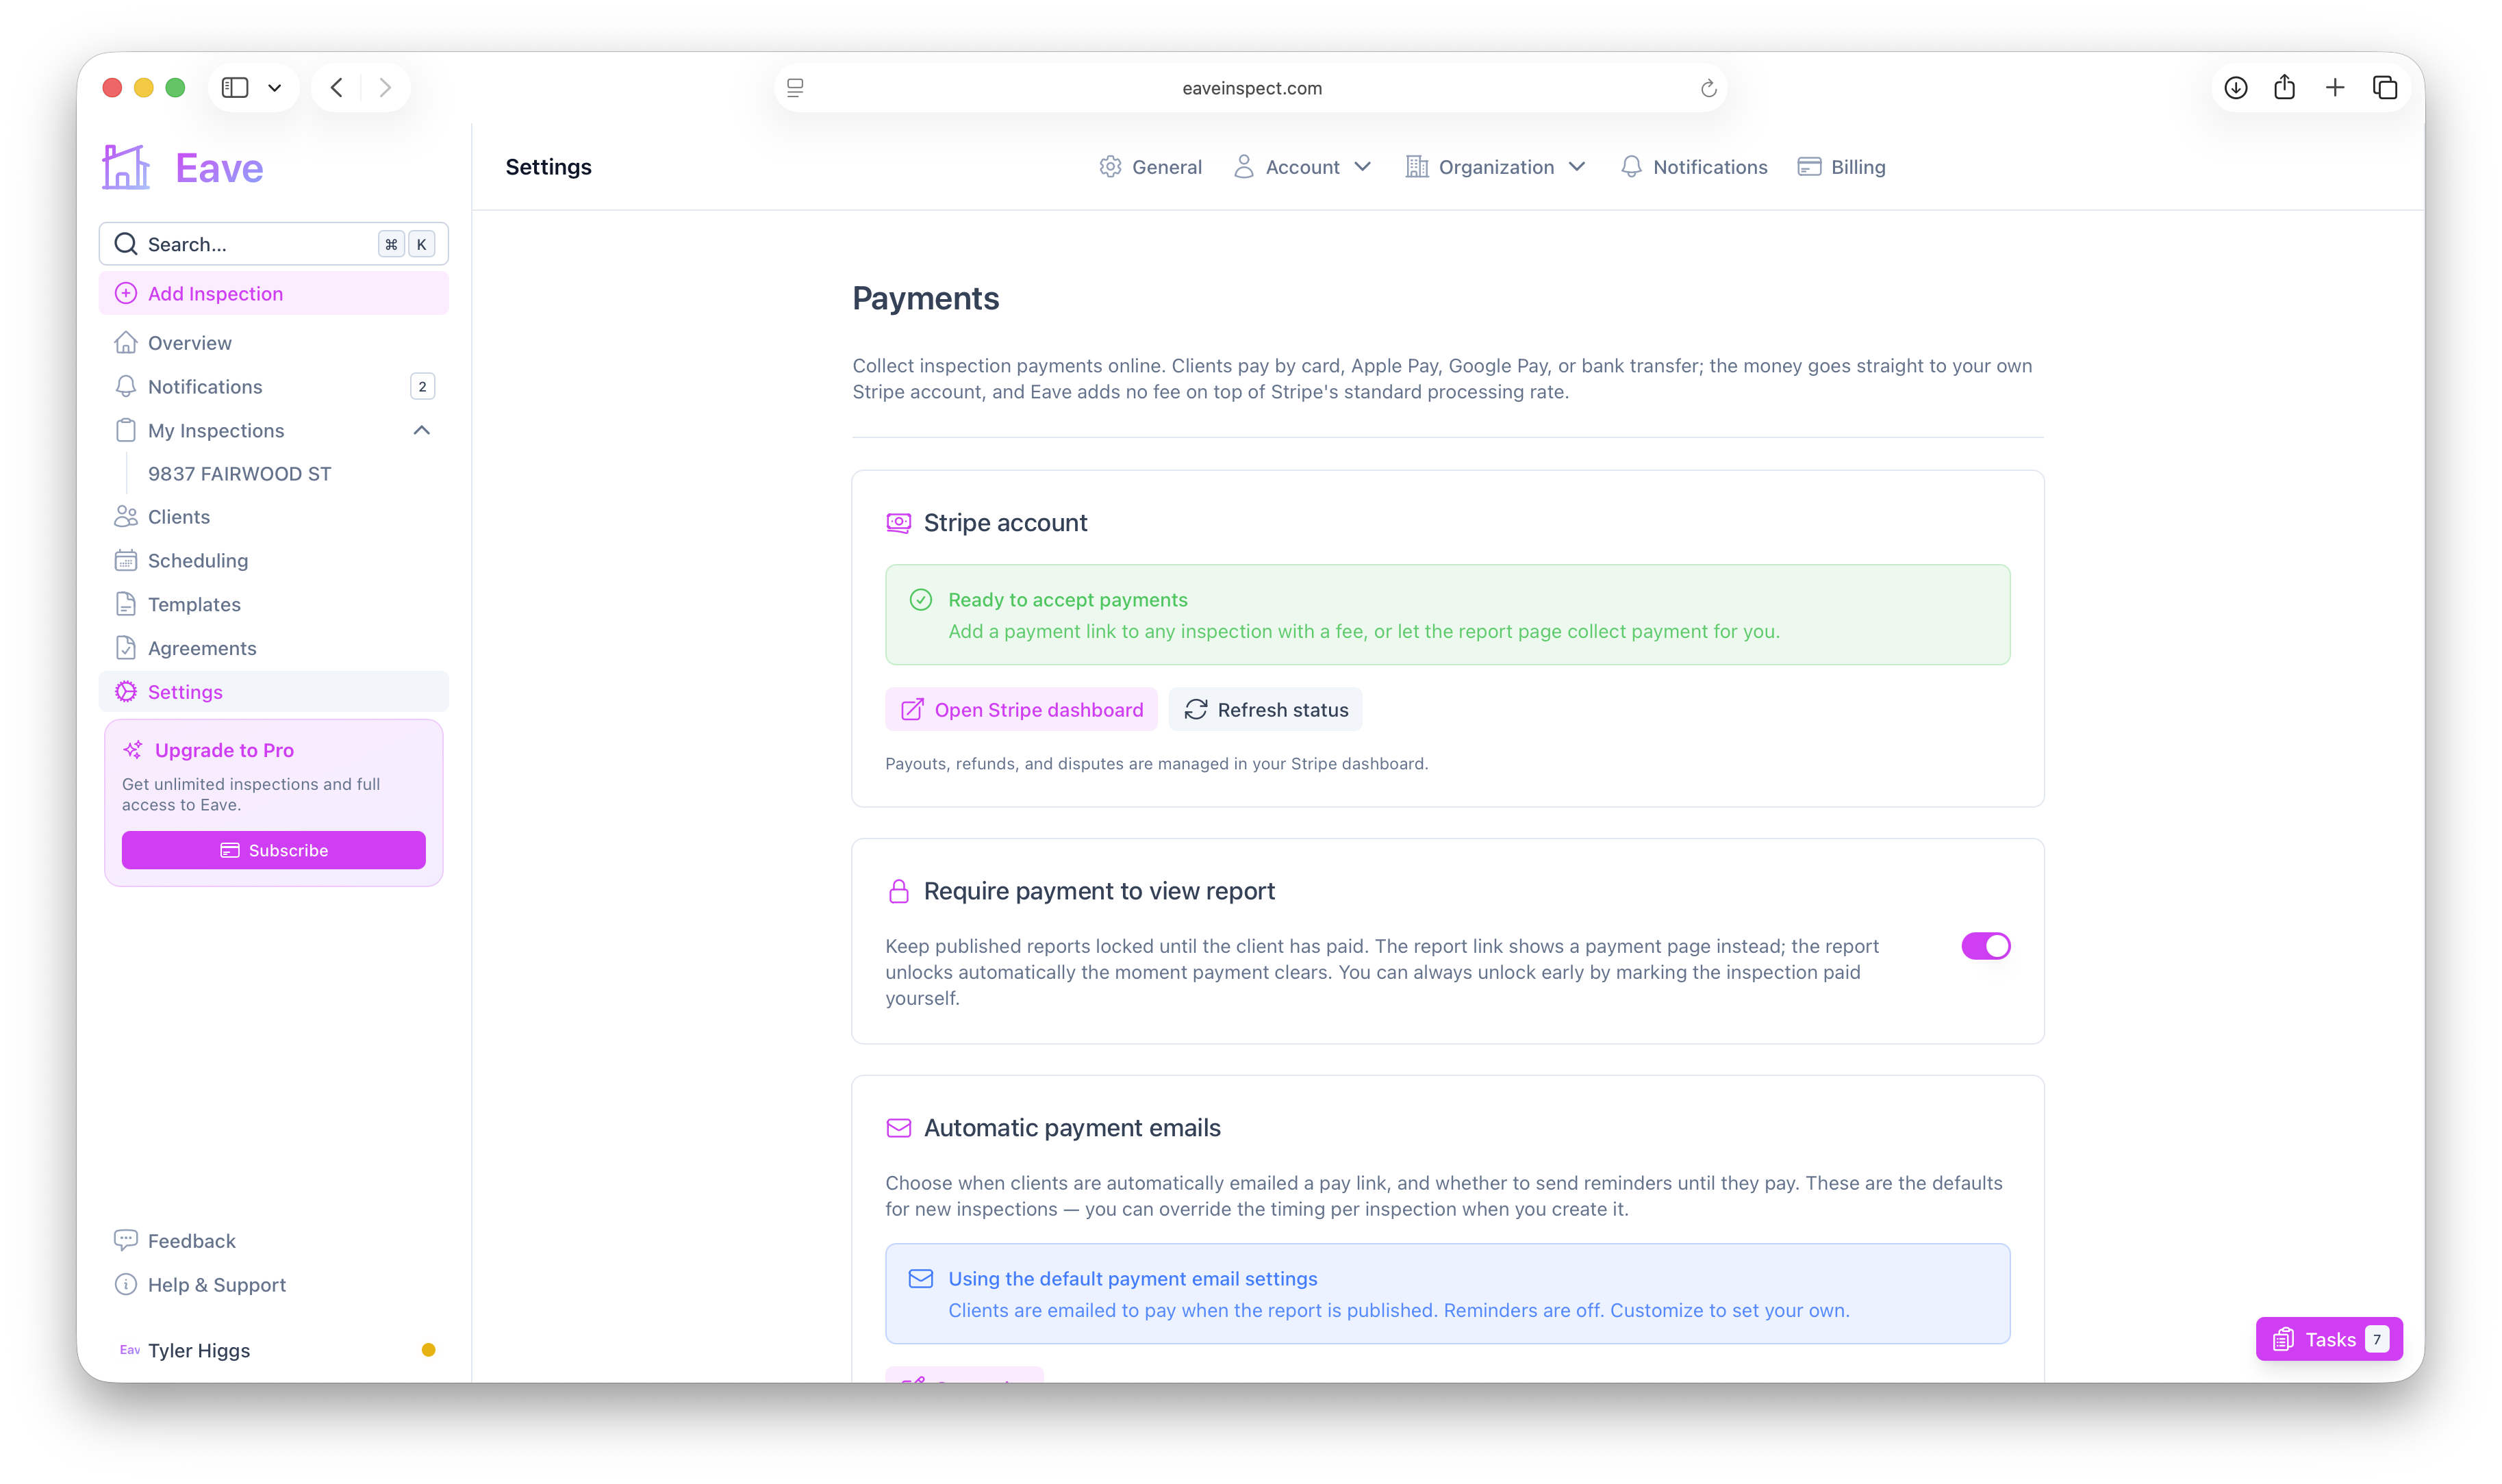
- Not set up — you haven't started. Click Set up payments.
- Setup incomplete — Stripe needs a few more details. Click Finish setup to return to onboarding.
- Under review — Stripe is verifying your details. This usually takes only a few minutes. Click Refresh status to re-check.
- Ready to accept payments — you're all set. You can now add pay links to inspections and turn on Require payment to view report.
If you just finished onboarding but the status hasn't caught up, click Refresh status. Eave re-syncs with Stripe (it can take a moment for confirmations to arrive), the same way the Billing page does.
After you're set up
Once your account is Ready, the Payments settings page gives you two more buttons:
- Open Stripe dashboard — your Stripe Express dashboard, where you manage payouts, refunds, and disputes. These all live in Stripe, not in Eave.
- Refresh status — re-sync anytime, e.g. if Stripe later asks for more information.
Refunds and disputes are handled entirely in your Stripe dashboard. Marking an inspection unpaid in Eave does not refund the client — see Collecting payment on an inspection.