Filling out sections
The body of an inspection is organized into sections and subsections, each made up of fields you fill out on-site. Your work saves automatically as you go.
Mobile
If you want to see how this works on mobile, see our mobile article
Navigating sections
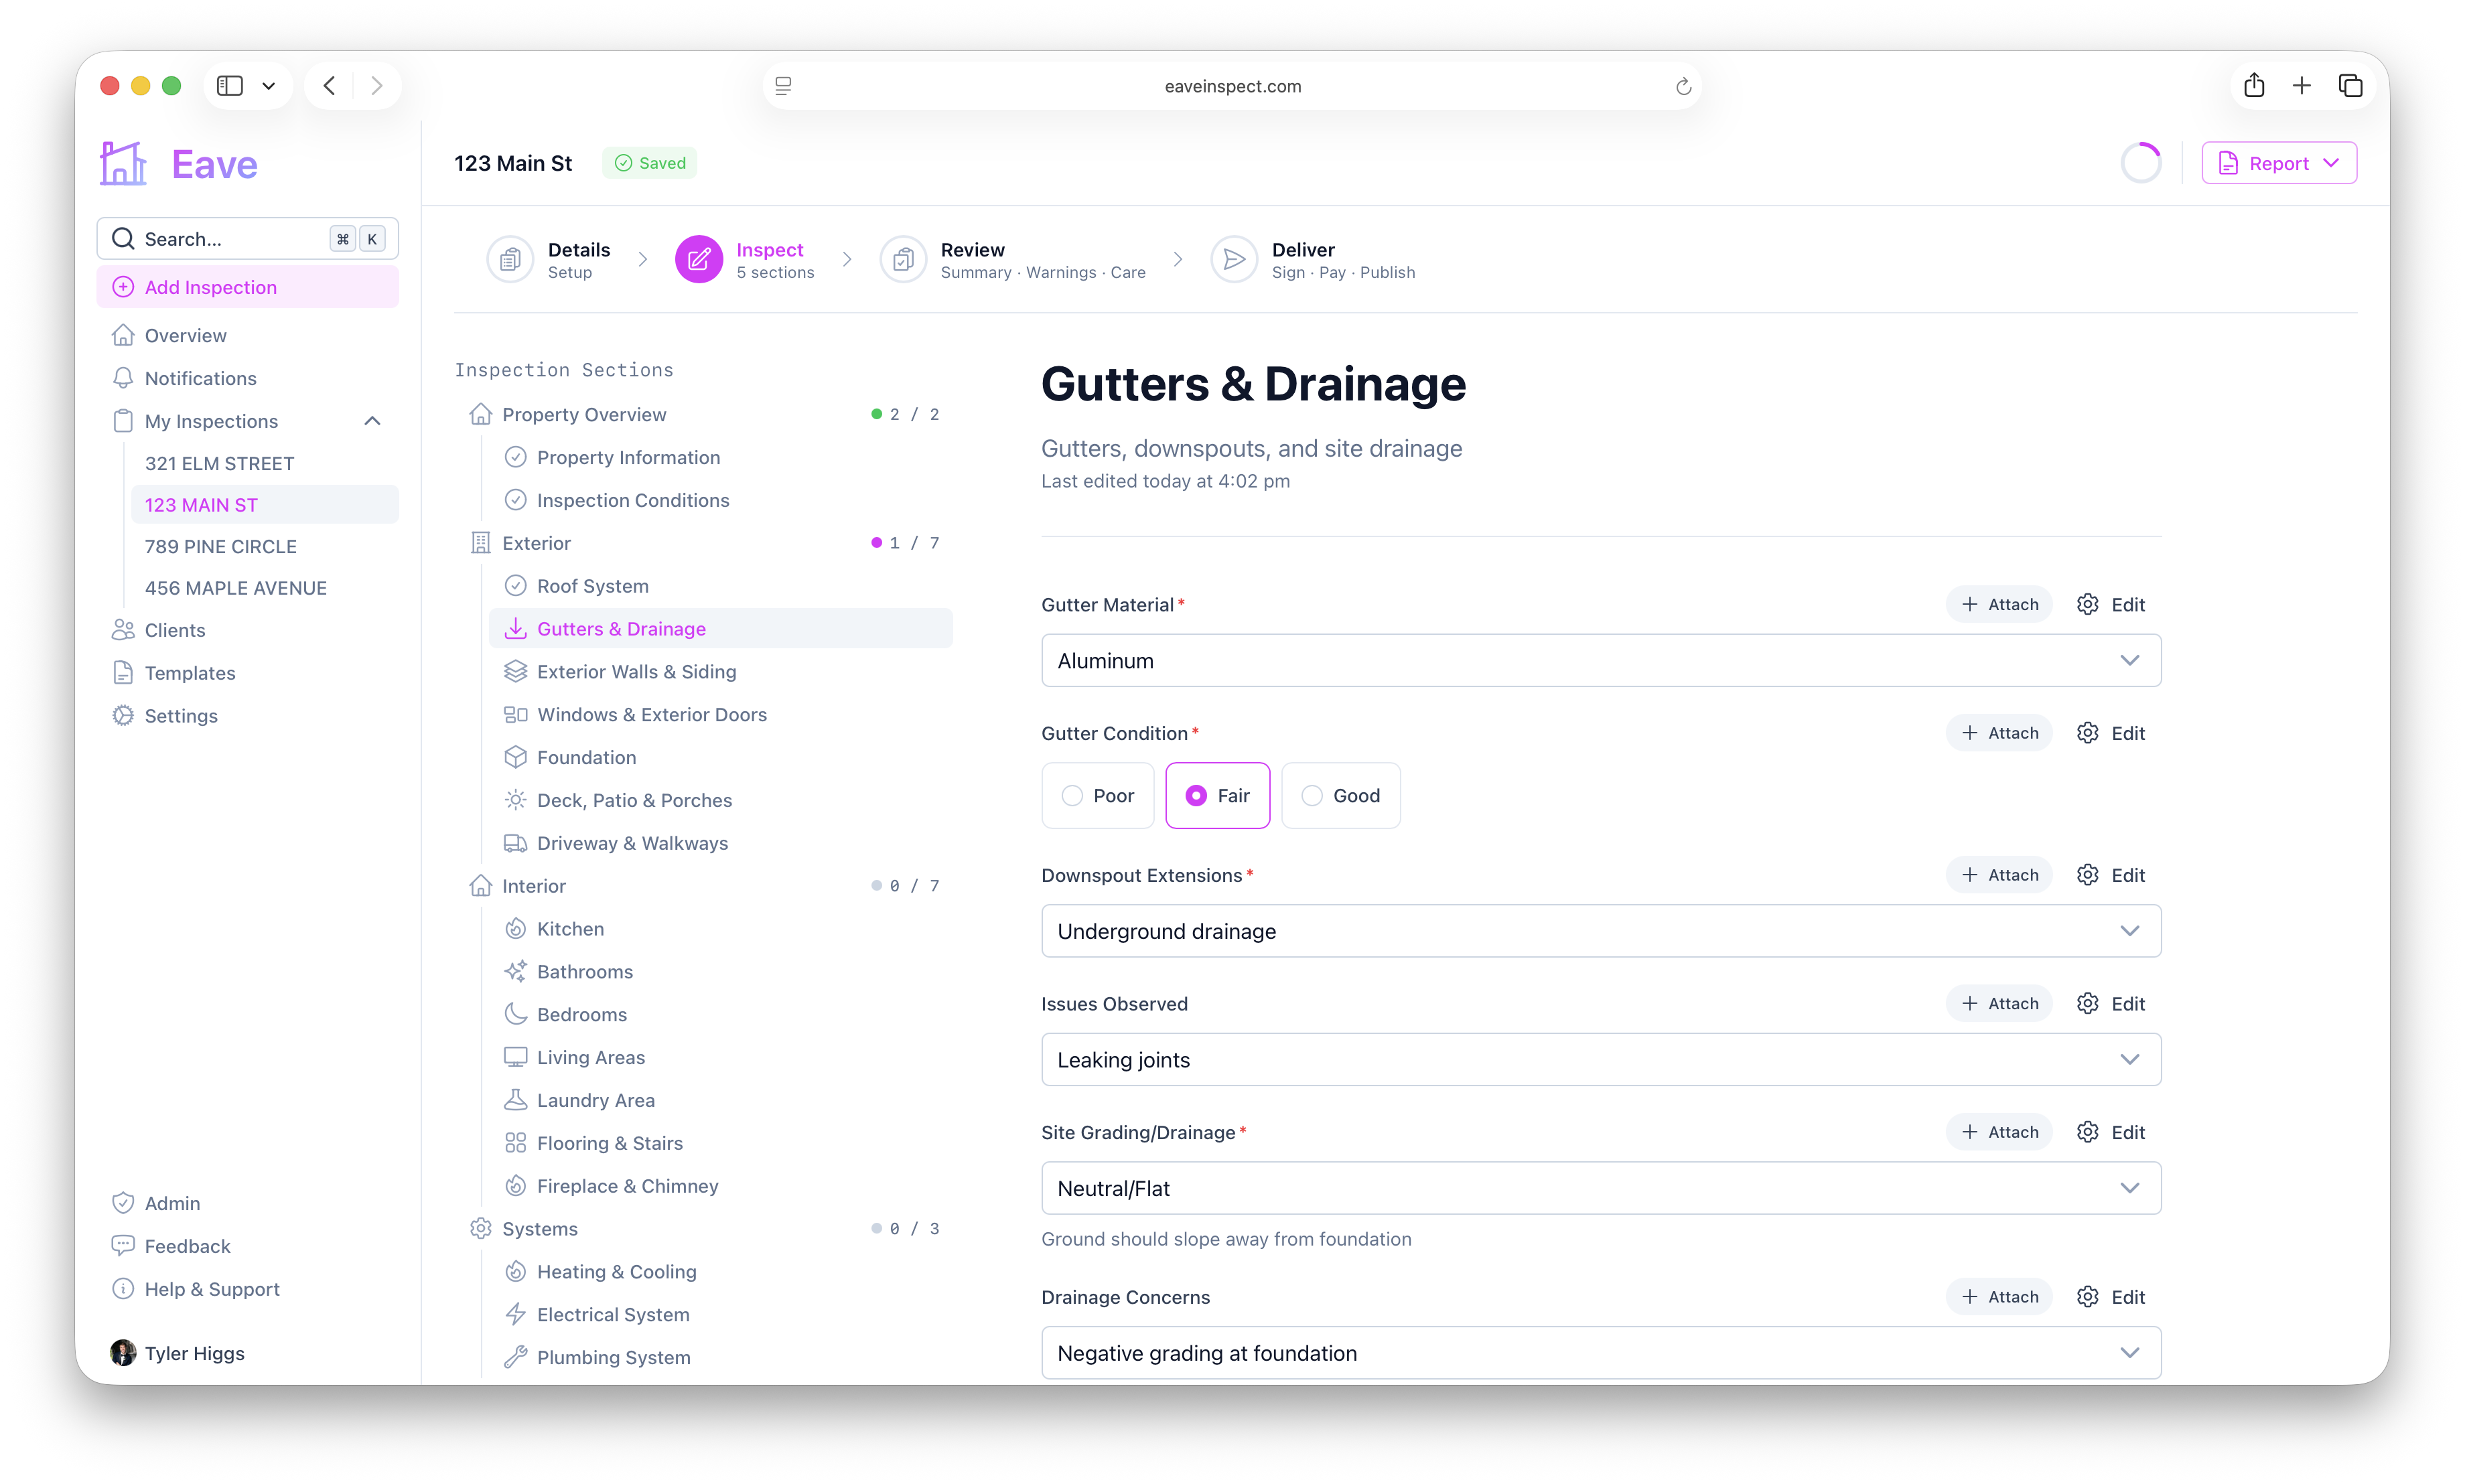
Inside an inspection, the stepper at the top moves you through Details → Inspect → Review → Deliver. The left sidebar lists every section with its subsections; click any subsection to open it. Completed subsections show a green checkmark.
Filling out a subsection
Each subsection shows its title, an optional description, and a list of fields. Field types include:
- Text — single line or multiline notes.
- Number — with optional units (e.g. years, sq ft).
- Yes/No — a simple toggle.
- Dropdown / Multi-select — choose from preset options.
- Rating — e.g. Poor → Excellent.
- Date — a date picker.
- Photo / Media — a gallery of photos and videos (see below).
Move through fields top to bottom, then use the Next button at the bottom right to advance to the following subsection.
Customizing fields
Each field in a subsection can be adjusted on the fly — you can attach extra context, rename it, or remove it entirely. These options are disabled once a report is published.
Attaching a description, media, or warnings
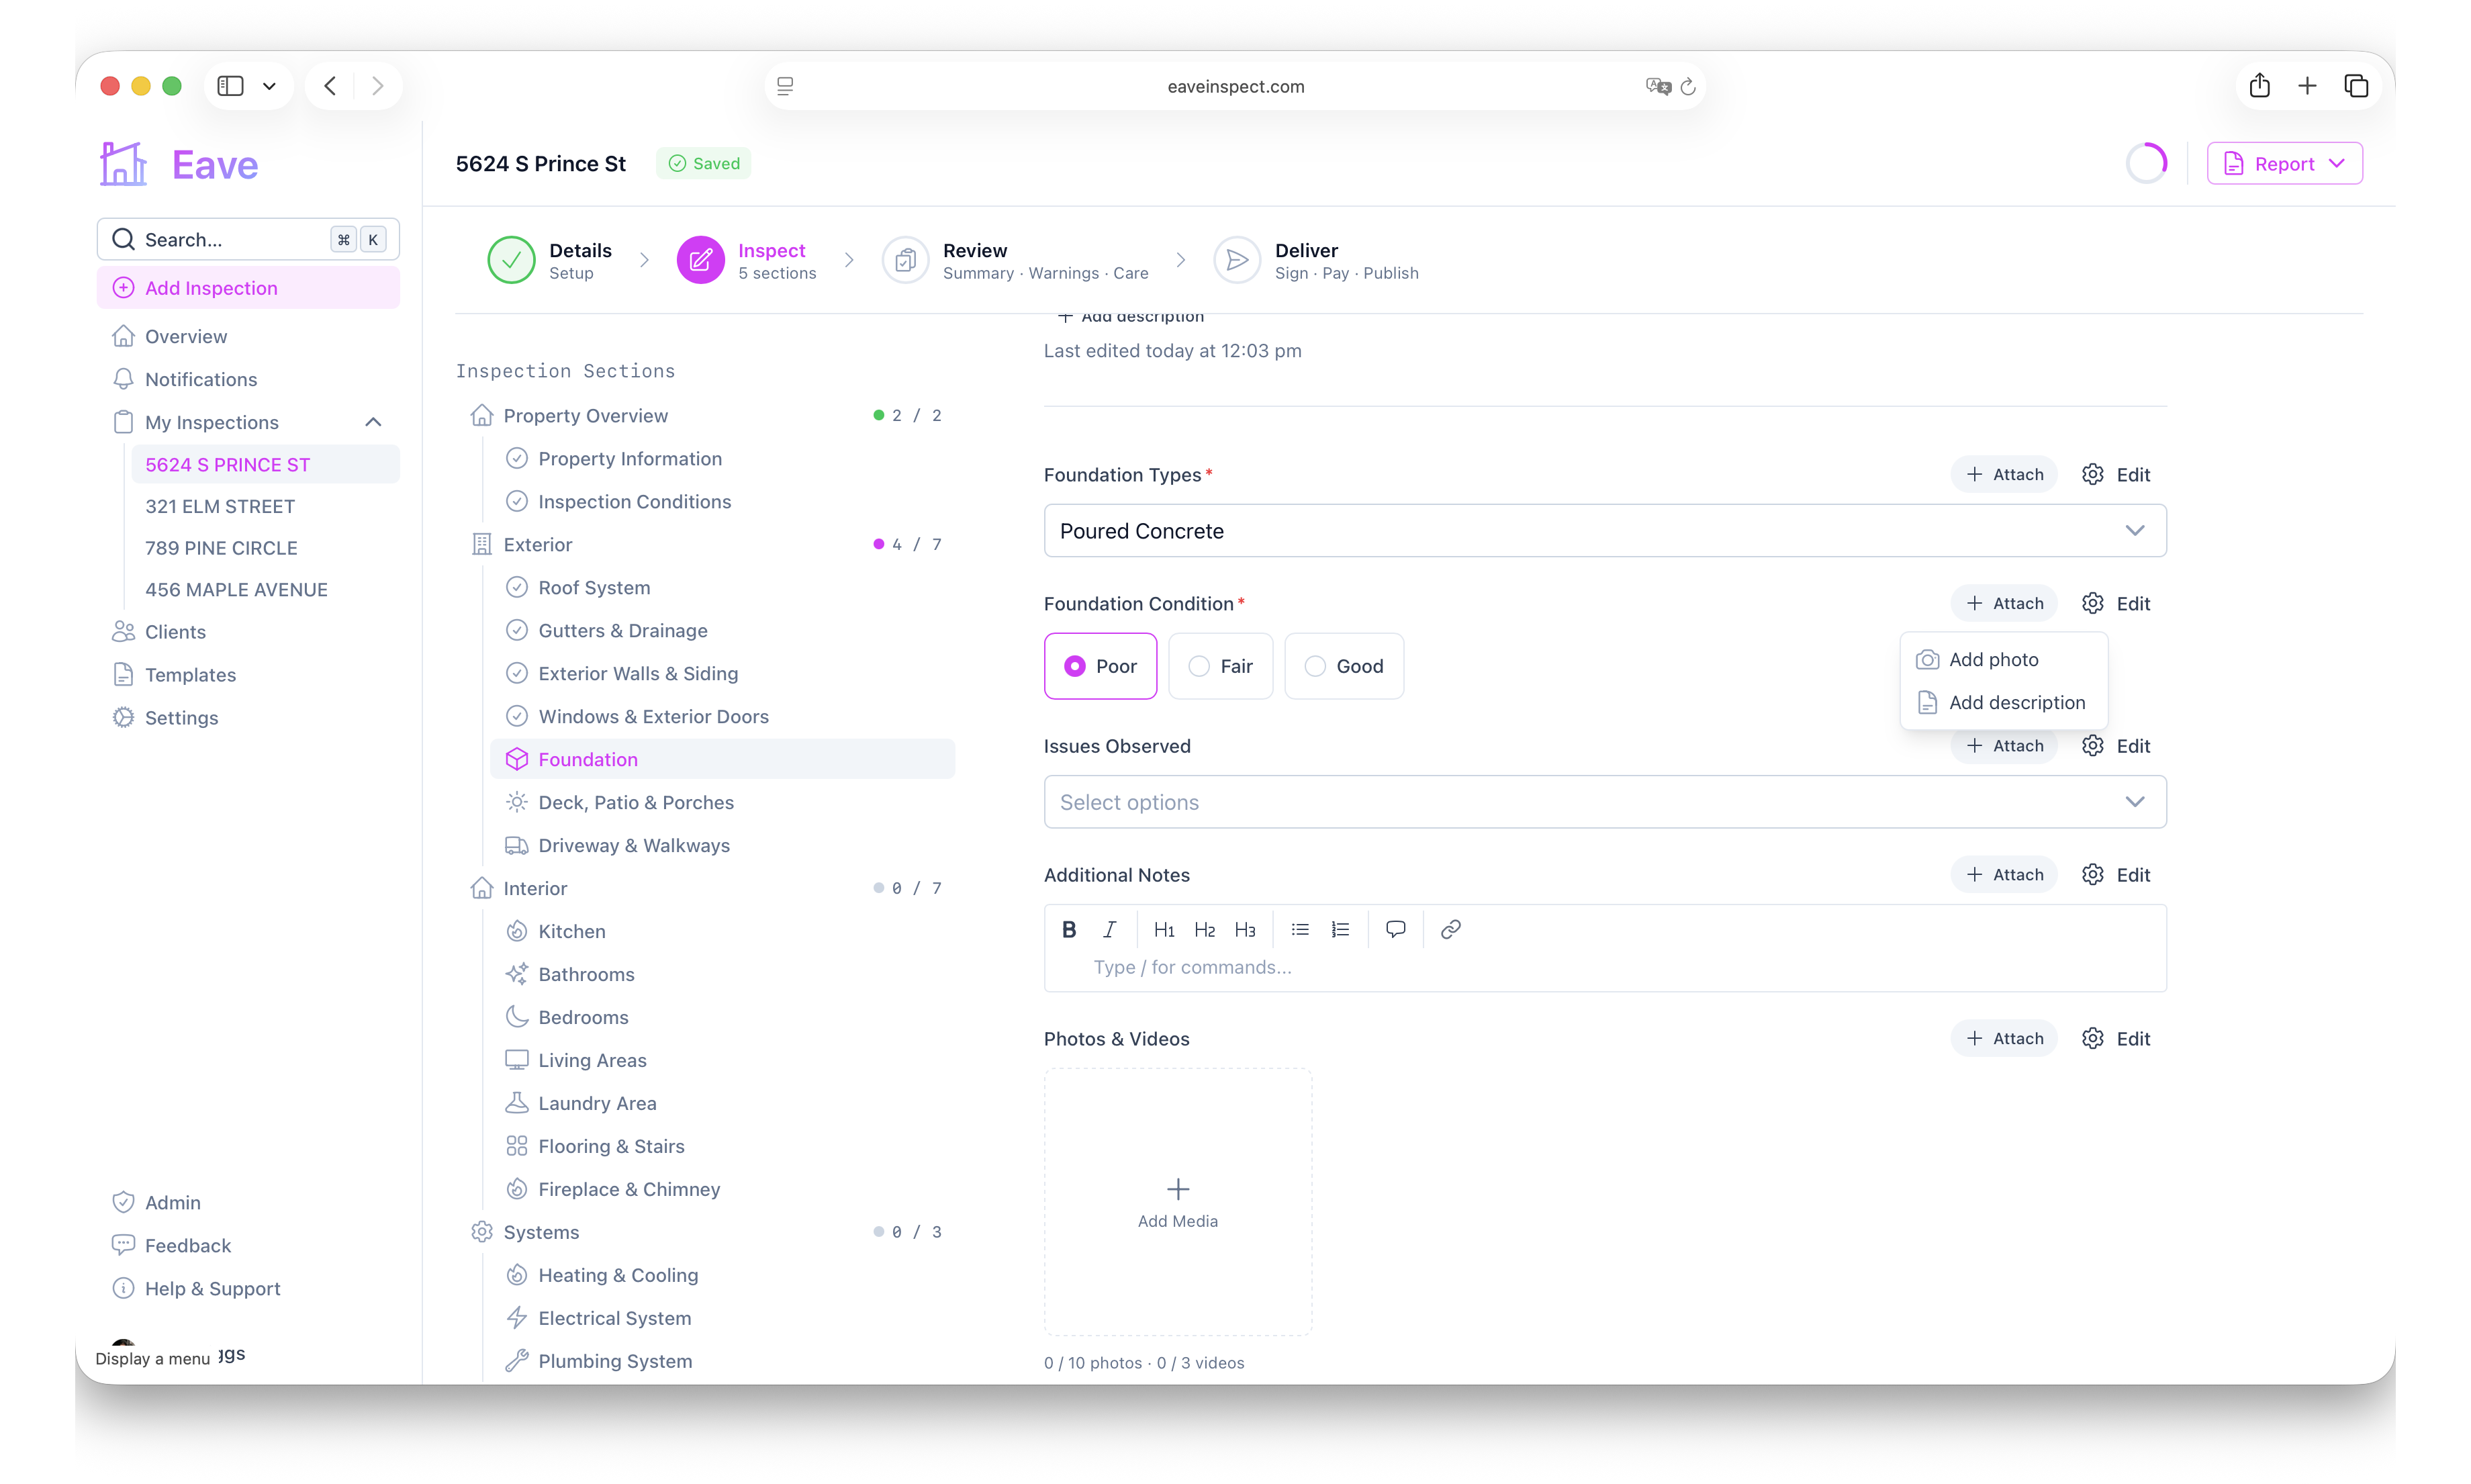
Below every field (except attachments themselves) is an Attach button. Click it to open a dropdown:
- Add description — inserts a text note field immediately after the field, indented to show it belongs to the parent.
- Add photo — inserts a photo/media field immediately after the field, also indented.
- Add Warning - inserts a custom warning attached to that field.
You can attach as many descriptions, photos, and warnings as you need under a single field.
Editing a field label
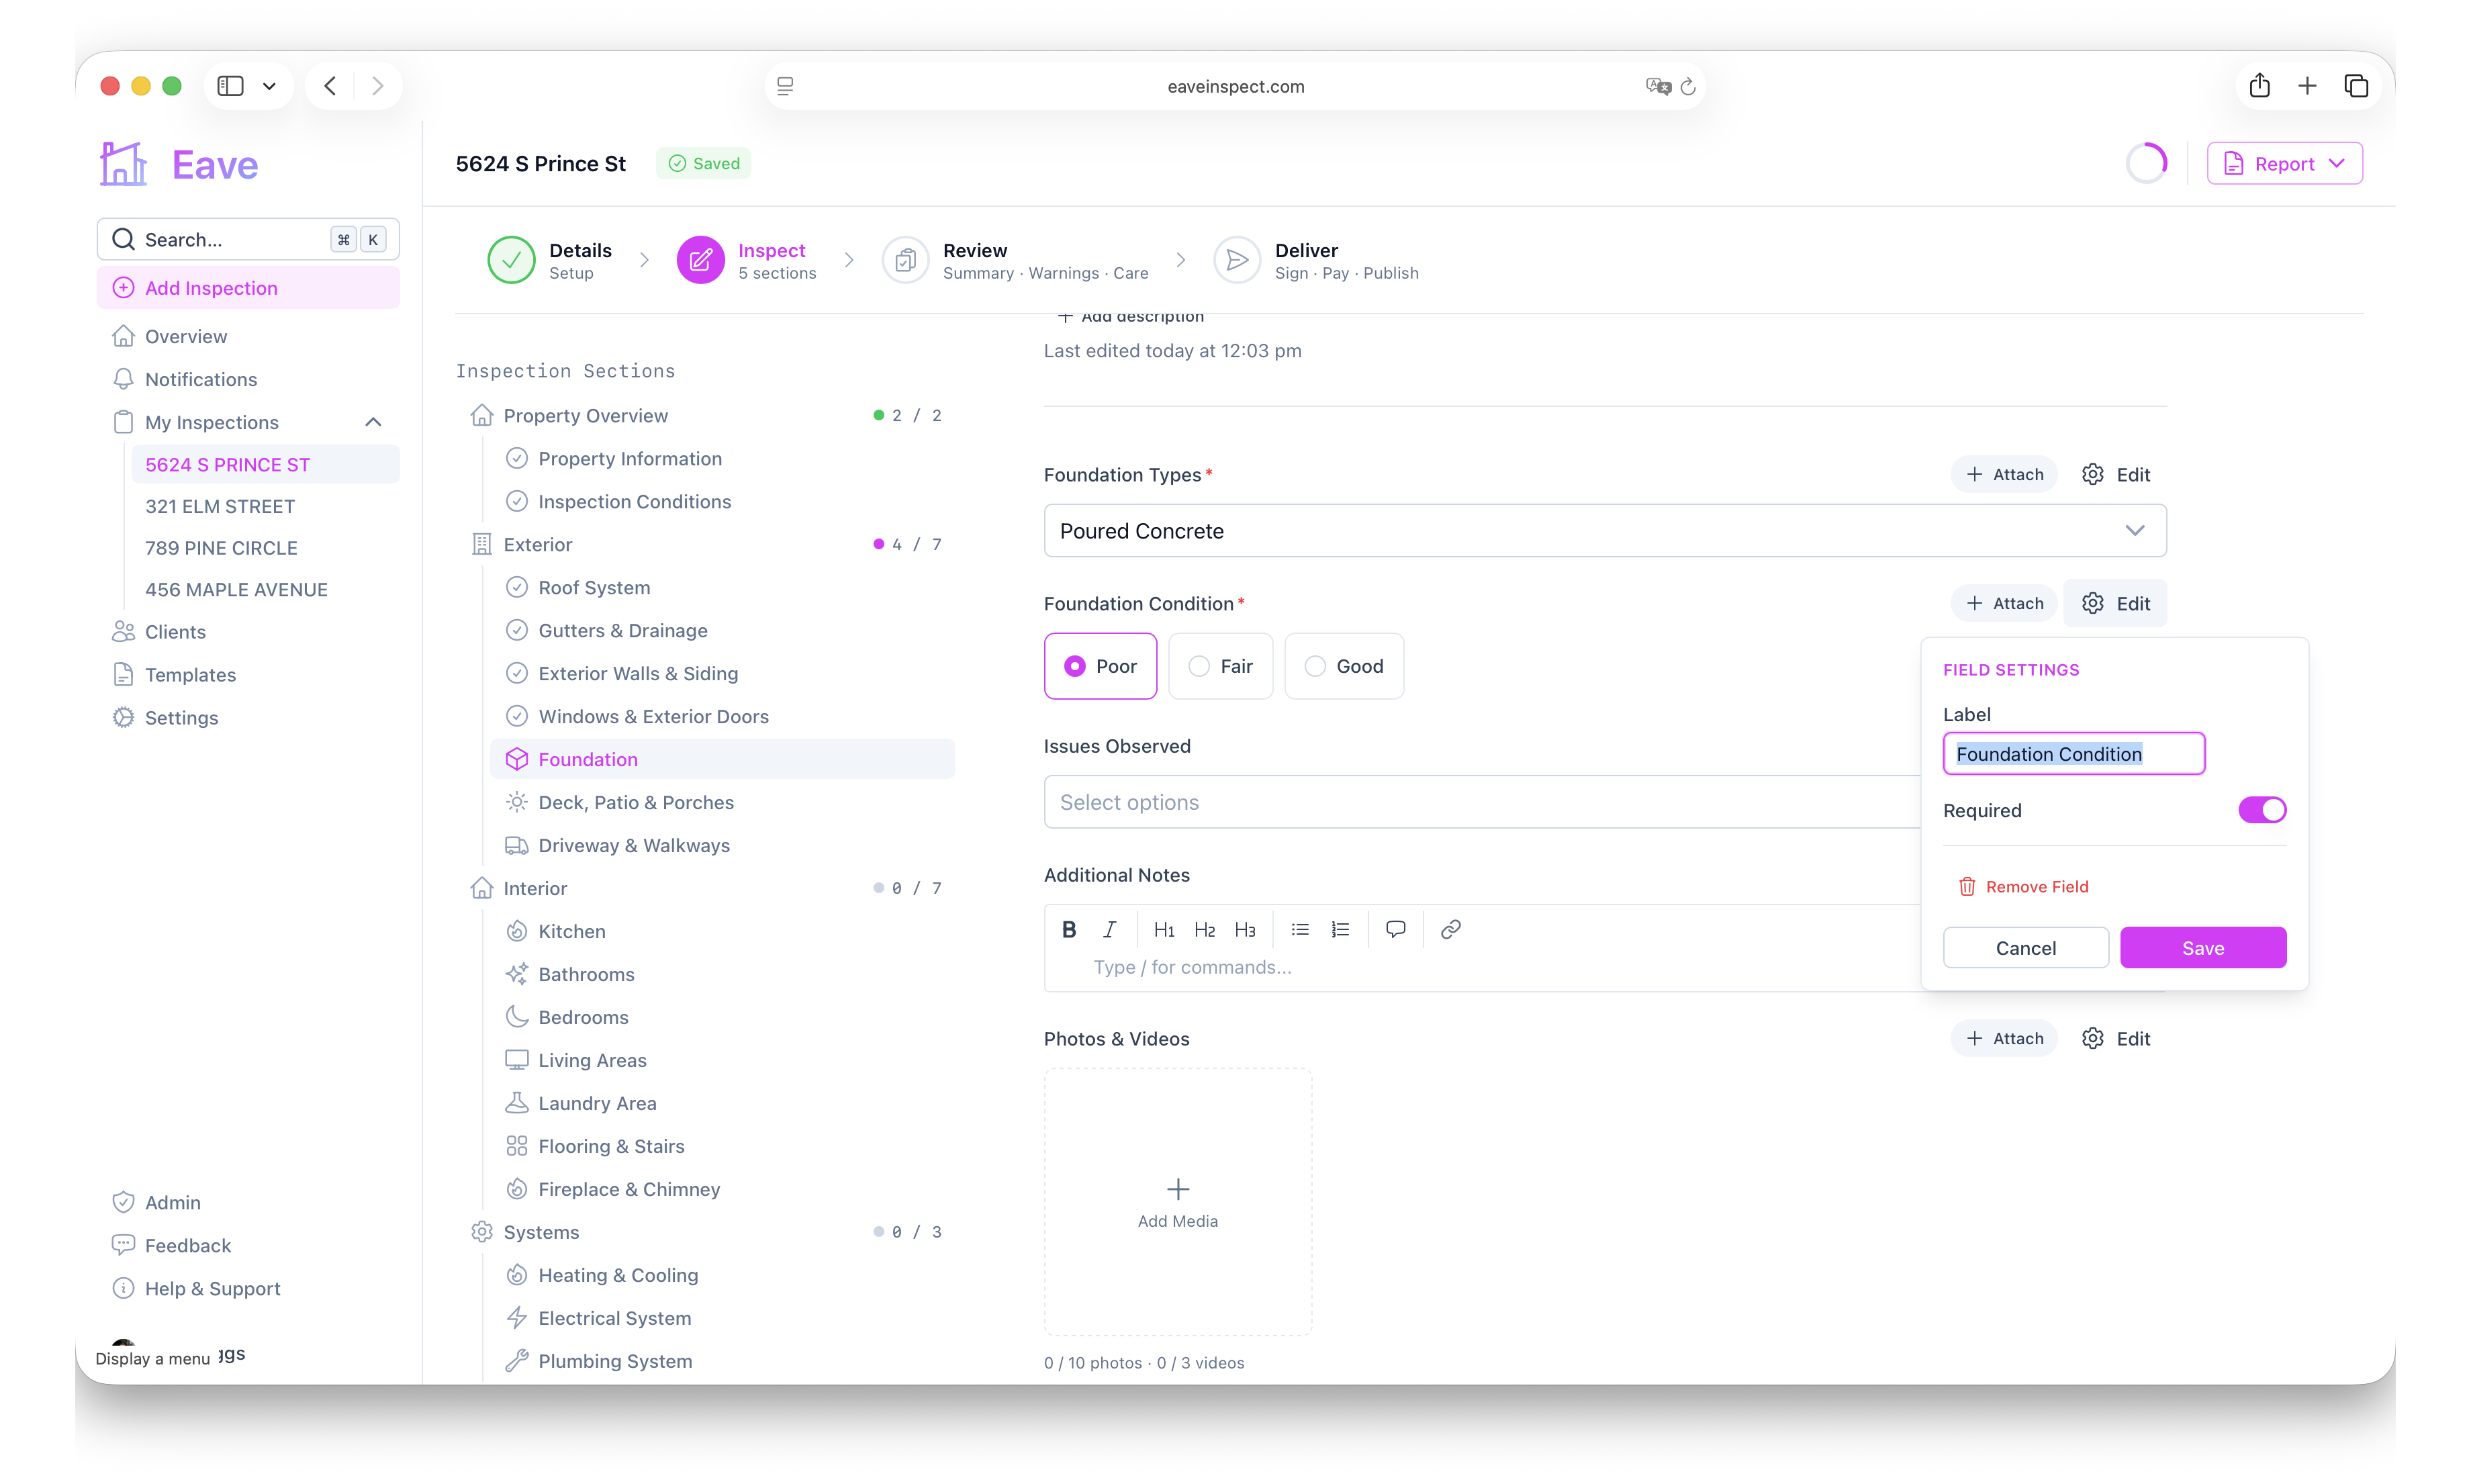
On desktop, hover over a field to reveal a gear icon button on the right. Click it to open the field settings popover:
- Edit the Label to rename the field for this inspection.
- Toggle Required on or off if needed.
- Click Save.
Removing a field
Open the same gear popover and click the red Remove Field button at the bottom. This permanently removes the field and any attachments under it, and clears all data entered for those fields.
Adding photos and videos
Photo fields show an upload box. Click it to choose one or more files from your device or camera.
- Photos — up to the field's limit (10 by default). Large images are automatically compressed to 2 MB and resized to 1920px on the longest side. HEIC files from iPhones are converted automatically.
- Videos — supported on Pro accounts (up to 3 per field by default, 50 MB each; MP4, MOV, WebM, and more). A thumbnail poster is generated automatically.
To view media, click a thumbnail to open the lightbox. To delete, hover a thumbnail and click the ✕ button. Photos can be annotated (drawn on) right in the lightbox.
What happens to your answers
Some answers automatically generate items elsewhere in the report:
- Concerning values can trigger warnings. See Warnings & safety notices.
- Certain items can trigger home-care tips. See Home care tips.
These rules are configured on the template — see Editing a template.